Read more: http://www.alltechbuzz.net/#ixzz2G2yO4UQK Upcycled Leather & Rhinestone Jewelry and Design ~ Mens & Womans ~ Sharing Crafting Tips: December 2012 Your SEO optimized title

Monday, December 24, 2012

Creative ways to display your products

Lately I've been brainstorming different ideas to make my display interesting for my next craft show. I don't want my booth to look like everyone else's, or it might get looked over. The only way to prevent yourself from having the same old look is to make your own. I recently blogged about a unique shelf I made from a old mannequin. Next up are these trendy boxes I purchased from Michaels. The first one I will show you has a neat design with gold foiling, adding a nice contrast to the subtle print.
 This box was available in different sizes but the one I bought had enough room for four racks. I love that this box has a lid, it makes it great for traveling to craft shows.

 In these next few pictures you will see what is holding up the bracelets. These small little dowels are very inexpensive and easy to cut with a hand saw. They can be found at craft stores and hardware stores.

 You might be wondering what is holding up the dowels? As you can see in the next pictures, I used small wood "O's".... Strange, I know. I found a selection of wood letters and was planning on using "C's" but realized if I cut the "O" in half I could get more for my money and in the end I think they held the dowels more securely. 
 I used leather glue.... It's what I had at the time LOL Anyways I just pressed the half circles where I wanted them for about 20-30 seconds and then let them dry on their own the rest of the way.
 The placing of the half circles took a bit of planning to make sure the rows would be evenly spaced. With a little bit of patience and a ruler... they turned out perfect!


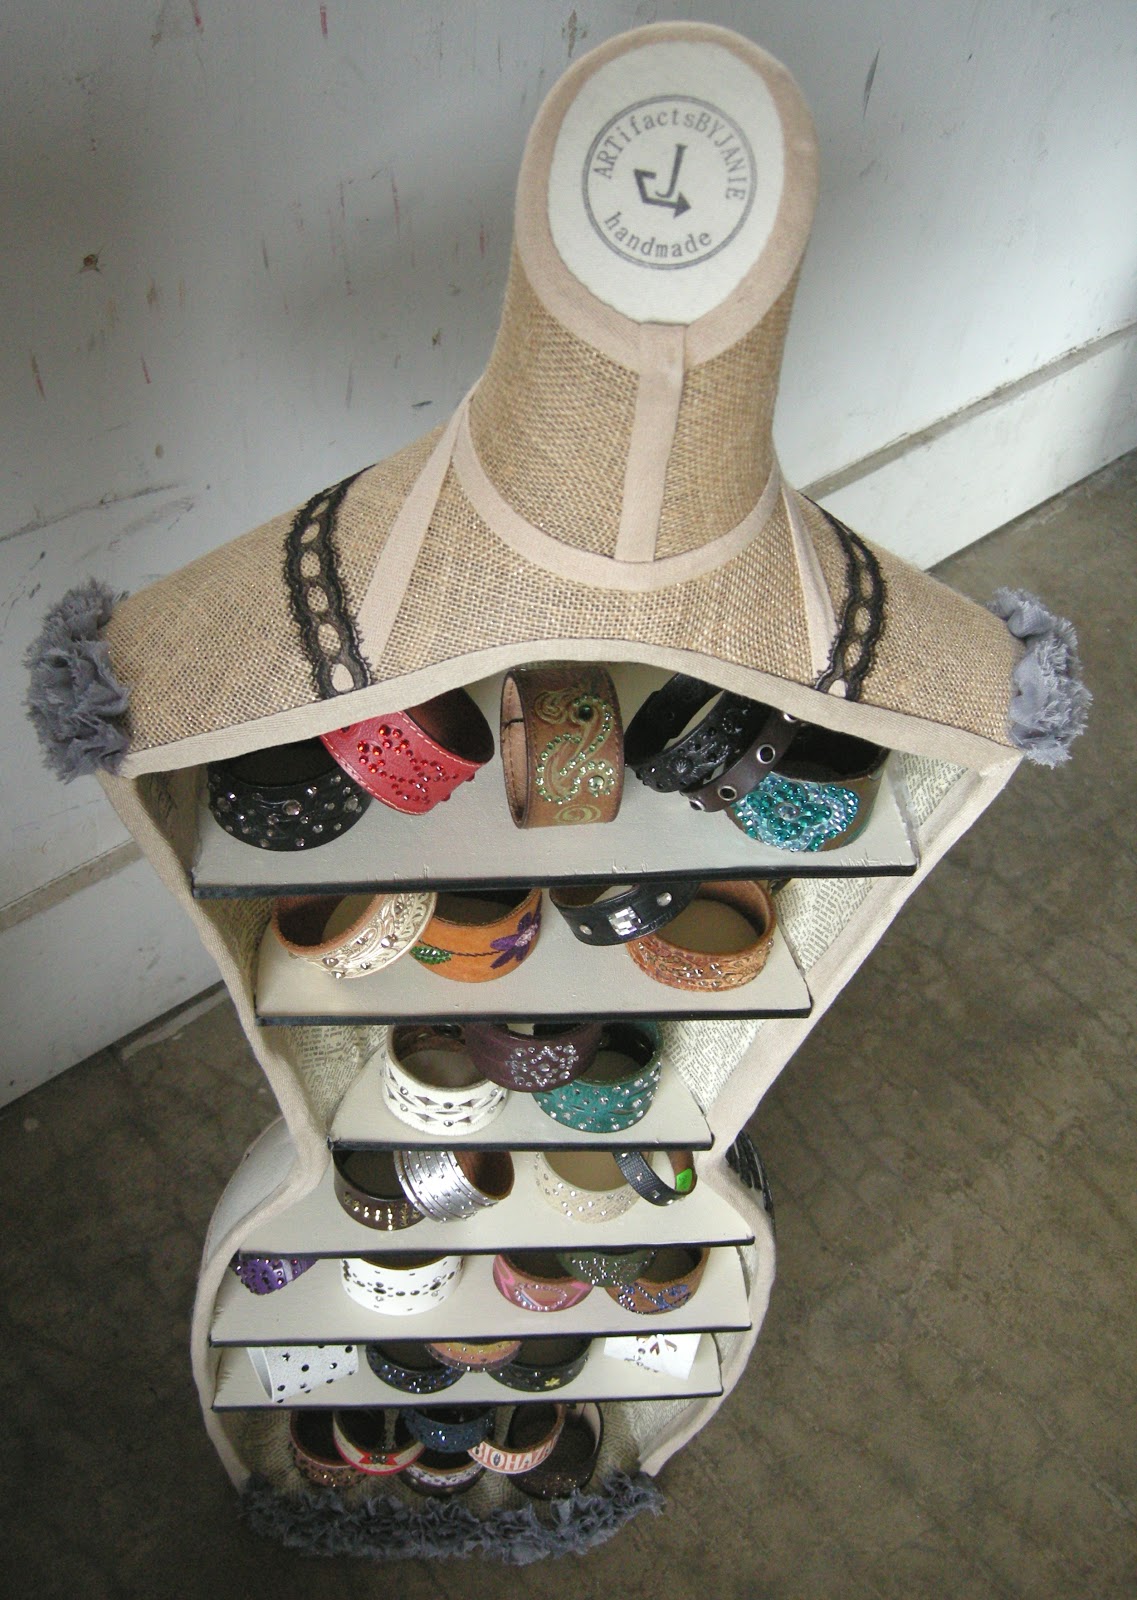
    I couldn't leave out the cuffs for men. Especially when I saw this neat graphic vintage style luggage box.(Also from Michaels) I love the look of this box. The latch closure and handle give it so much character.  
This box was a bit larger than the previous box. It had enough room for five rows of cuffs.

 I used the same supplies as I used for the first rack. This time though, I painted the "O's" and the dowels black to match the inside of the box.


 Well, that's it for now. Let me know what you think. Have you made any displays your proud of? Comment Below and share!

Tuesday, December 4, 2012

New life for a mannequin

Well, I previously blogged about a mannequin that I wanted to repurpose into a shelf to display my bracelets for craft fairs and like events. I am finally finished. I took some pictures with my inventory so you can see how I plan on using it.


I used "Grungeboard" by Tim Holtz for my shops name. After a coat of flat black paint I finished them off with a script stamp in white ink.


 Altogether we installed six shelves. I say we, because my husband did the cutting. They are made from 1/4" plywood that I bought from Hobby Lobby. I painted them a very light cream and added 1/4" black ribbon on the trim.


Most of the outside is covered with burlap (from Joann's) and also a cream tone canvas style fabric. I cut the material into different shapes so it would lay flat against the mannequin. Modge Podge is my new best friend. All the material on the outside as well as the dictionary pages on the inside were applied with Modge Podge.


I was trying to go for more of a vintage industrial look, but with the gray ruffled trim I may have dipped a little into shabby chic. 


One of my favorite tools I've bought for my Etsy shop is a personalized logo stamp. I bought it off Ebay for about 11 bucks. Super cheap, but it really adds a nice touch and I keep finding different ways to use it.


I just fell in love with these brass buttons (from Joann's) and I had to incorporate them somehow. I think they look perfect. What do you think?


The swirl was made from black rhinestones, adhered with a glue gun. 


You may be wondering what these numbers mean. They are meaningful, in fact its the date I opened my Etsy shop. October the 20th of 2011. I decided that I wanted to stamp them the way the date is written in Europe - putting the day, then month and year.

The hole that you see in the back was already there, and instead of covering it up I decided to leave it. Since the mannequin is tall, and would be easy to topple over on a table, I thought I could use a clamp to secure it to my table. With the hole in the back, the clamp won't be as noticeable.

That's it for pictures. I hope you liked my new project and maybe thought of some new ideas yourself. Share your thoughts below! :-) Thanks for reading
var _gaq = _gaq || []; _gaq.push(['_setAccount', 'UA-36850375-1']); _gaq.push(['_trackPageview']); (function() { var ga = document.createElement('script'); ga.type = 'text/javascript'; ga.async = true; ga.src = ('https:' == document.location.protocol ? 'https://ssl' : 'http://www') + '.google-analytics.com/ga.js'; var s = document.getElementsByTagName('script')[0]; s.parentNode.insertBefore(ga, s); })();